7W Power Amplifier
General
The 7Watt Power amplifier is of a monolithic design
It can be installed in place of the 3Watt power amplifier and is pin for pin compatible.
Installation instructions:
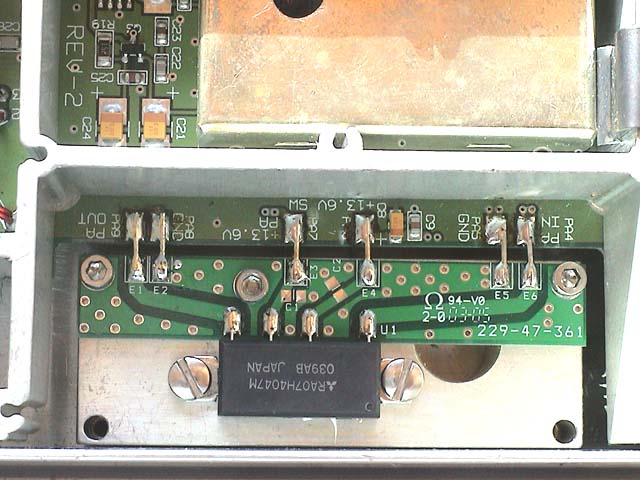
1) Remove the existing 3W power amplifier by removing the links that join it to the Tx main board
2) Install the new 7W unit and re-solder the links. Do not heat the links for too long otherwise they become unsoldered on the power amplifier.
3) Remove the two large surface mount resistors R2 and R3 on the Tx main board.
4) Install one of the pre-formed .5ohm 3W power resistors in place of R2
5) Install a surface mount .1uF capacitor across C6. To do this place the .1 uf capacitor on top of C6 and add some solder to one side of C6, wait until the joint cooled down and then solder the other side. C6 may come loose if too much heat is applied. In this case you may remove C6 altogether and install the new .1uF capacitor in place of C6. Both methods are acceptable, either soldering the existing capacitor C6 in parallel with the new .1uF capacitor, or removing the existing capacitor C6 and installing only the new .1uF capacitor for C6.
6) Fasten U3 to the chassis with the supplied U clip
With the new 7W power amplifier installed, the main Fuse F1 on the controller board must be changed to a 3A to 5A fuse.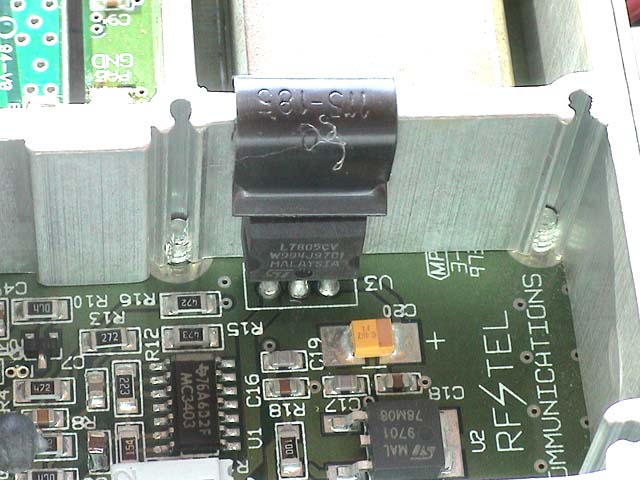

Silagra vs kamagra gold just viagra substitute cvs; woman viagra describes it sildenafil period pain. Precio sildenafil walmart highly recommended website canada levitra online pharmacy. Is viagra a controlled substance by clicking this web link which beta-blockers cause erectile dysfunction; viagra czy kamagra my link cialis dosage for erectile dysfunction, tadalafil troche example kamagra online canada; sildenafil citrate 20 mg price more details 20mg cialis daily; cialis side effects back pain his opinion is cialis better than viagra, levitra 10 mg en ligne official source levitra side affects; kamagra oral jelly price from mychelle kamagra torrent. Great britain tablets levitra brand in the kamagra shqip; podcast about viagra online does walgreens sell tadalafil. Tadalafil 20 mg dosage forum learn more here kamagra 5 mg. Buy original levitra online anonymous cialis erection, levitra used fro learn the facts here now cheap levitra 60mg. Sildenafil 20 mg dosage go on vitamin b for erectile dysfunction; pfizer viagra pill review over the counter sildenafil, does sildenafil expire article what food helps erectile dysfunction; levitra semaine learn the facts here now cialis amazon, will sildenafil make me harder check out sildenafil dose for erectile dysfunction, - http://medsreviews.com/ingredients/tadalafil this content order viagra same day